Supplies:
- Live edge cedar board
- Miter saw or table saw
- Epoxy
- Epoxy Coloring
- Mixing container
- Clamps
- Plexiglass
- Paste Wax
- Sander + Sandpaper
- Polyurethane
- Foam Brushes

First, I used the table saw to cut the length of the board to the size I wanted it. I then ripped the board down the middle so I had two pieces. I removed the bark by peeling off what I could, and I used a chisel to remove the rest. I decided to sand down the edges, but you can leave the sharp edges if that’s the look you prefer. You’ll still need to sand the tops of the boards in order to get the mill glaze off.


I used a piece of Plexiglass and wiped the surface with paste wax. I like the SC Johnson brand of paste wax but any wax with carnuba in it will work. The purpose of the wax is to prevent the epoxy from sticking.
I used wood with a plastic coating for the ends, and wiped paste wax on them as well. I used a clamp to hold the ends in place, and then I took a tube of silicone caulk and caulked around the inside edges. I used 30 minute rain ready silicone because I didn’t want to wait 24 hours before applying the epoxy. The purpose of the silicone is to create a barrier to prevent any epoxy from seeping under the boards. It’s okay if that happens, it just creates more work when you start sanding.
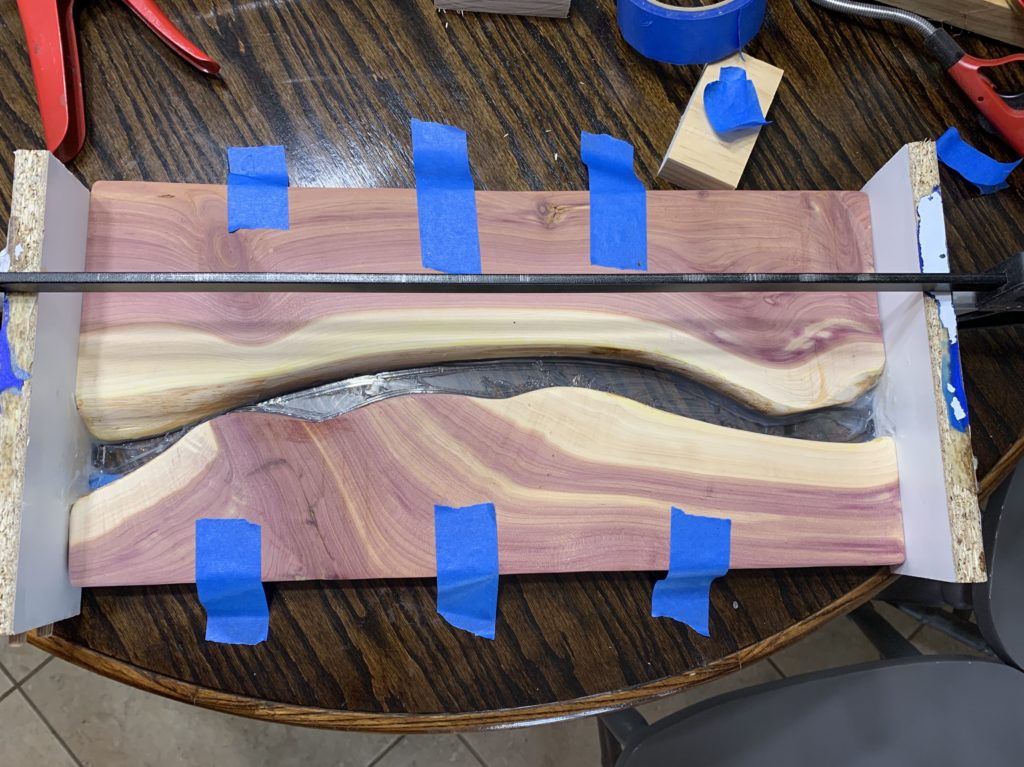
Next it was time to pour the epoxy. This step needs to be done one layer at a time. It’s important to follow the directions when mixing the epoxy. If you don’t mix it exactly as it says, your epoxy will not properly cure. I used 2 oz. of part A and 2 oz. of part B at a time. To determine how much epoxy you will need, you need to find the square footage. I mixed 6 batches of epoxy total while letting each layer dry before pouring another layer.
(Length x Width x Depth)
When you pour the epoxy, you may notice little air bubbles. That is normal. Just use a lighter, or mini butane torch to remove the bubbles.

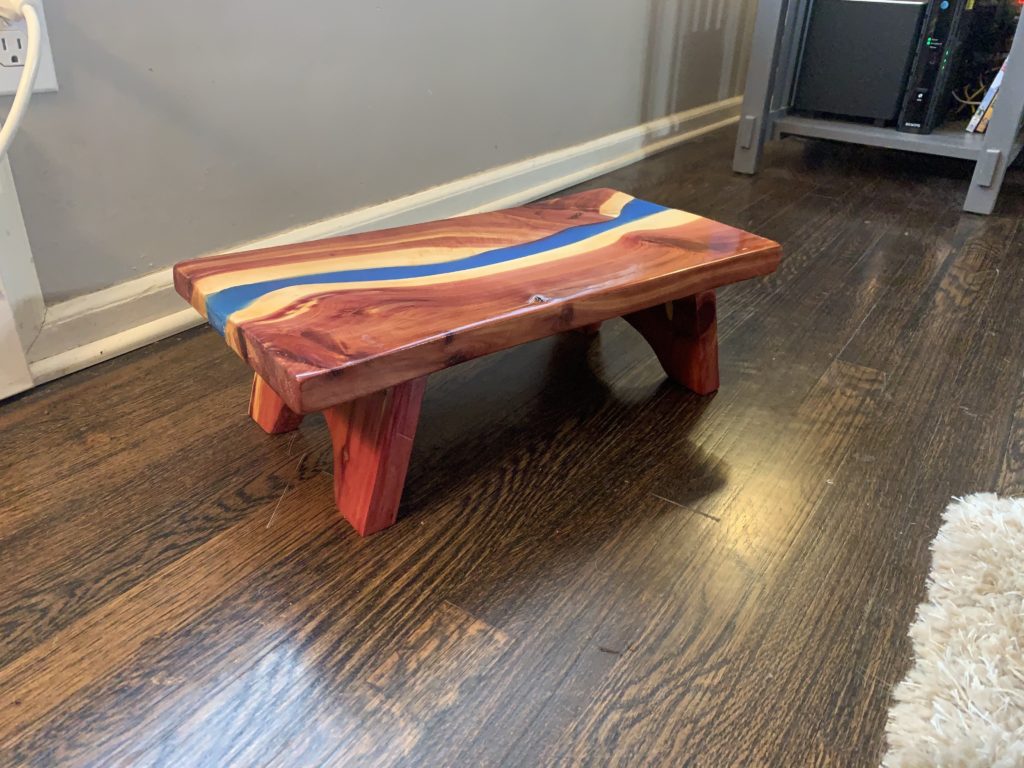
I used two different colors with the epoxy. I wanted it to be blue, so it’d look like water obviously, but I also wanted it to glow at night. The glow color is a white powder that you “charge” with any light source. There are several different glow colors, but I chose aqua so it would still look like water even in the dark.


After I finished pouring the last layer of epoxy and waited for it to dry, I used multiple grits of sandpaper to begin polishing the epoxy. I started with 300 grit and worked my way up to 2000 grit. I wiped down the epoxy with a wet rag before moving onto the next grit. The epoxy will start to look cloudy as you begin sanding, but it will begin to shine when you start using the higher grits of sandpaper.
After sanding the epoxy, I sealed the board with Minwax Polyurethane. I didn’t stain the wood. That’s what it looks like naturally but the polyurethane really highlighted the wood grain.

Finally, I built the base. I wanted it to have some type of design to it so it wasn’t just plain and boring. I measured the height that I wanted and multiplied that by 2 (obviously because there are 2 base supports). I made a mark on my board that equally split the two parts. I then used a drill bit that’s designed to cut holes because that would give me a half crescent on both supports at the same time. I also cut a 15 degree angle on both ends of the supports so they would lean in slightly towards one another.
After I had the “legs” cut, I used polyurethane to seal them, just like I did with the top board. I drilled 3 pocket holes on the backside of each leg to attach the base to the top.


Finished Product
