A Beginners Guide to
Refinishing Wood Furniture
I really enjoy refinishing wood furniture and I’ve learned a lot through trial and error. I’ve put together this step-by-step guide to help DIY’ers and beginner’s with their wood refinishing projects. First things first… does your wood furniture really need to be refinished?
Things to consider:
- Is the construction high quality?
- Is it solid wood or particle board?
- Does it have water rings or heat marks?
- Is the finish damaged… chipping, peeling, cracking etc.
If the answer to those questions is, no, then you may just want to leave the piece as it is, or simply revive the existing finish. To revive an existing finish, you’ll first want to clean the surface. You can use an all purpose cleaner, or you can also use soap and water, which is just as effective. I personally like using ‘Krud Kutter’.
After cleaning, you can use one of the options below to revive the finish.
- Furniture Wax
- Howard’s Restor-A-Finish
- Various wood-toned colors
- Howard’s Restor-A-Shine
Refinishing Wood Furniture Step by Step
Step One: Clean and Degrease
The first steps when refinishing wood furniture are the most critical, because without proper prep work your project could fail. Prep work is different depending on the existing state wood, but it’s always important to start with a clean surface. Like I mentioned above, you can use an all purpose cleaner, or you can also use good ‘ole soap and water, which is just as effective. I personally like using ‘Krud Kutter’.
Step Two: Remove Existing Finish
Does it have an existing finish, or is it bare wood? If it’s bare wood, skip to step 3. If it does have an existing finish, the next step is to decide if you’re going to sand it down to the bare wood, or if you’re going to use a chemical stripper.
Sanding
I would recommend sanding down the finish if it’s not very thick, or if the finish has deteriorated and is starting to peel off on it’s own. If you have a belt sander, you’ll save yourself A LOT of time, but an orbital or mouse sander will also work.
- Start with coarse sandpaper like 40 – 60 grit.
- Once most of the finish has been removed, switch to a medium grit sandpaper like 100 – 120 to begin smoothing out the wood.
- Finally, finish sanding with a fine grit like 200 – 220.
- Remove any dust from sanding with a tack cloth.
Stripping
If the existing finish has multiple layers, it will be easier to use a chemical stripper. Before stripping, make sure your project piece is in a well ventilated area, as most strippers have a strong chemical odor (VOCs). If you’d like more information on VOCs, click here.
Being a former paint department manager, I’ve had the opportunity to try many different strippers. In my opinion, Citristrip is the best stripper on the market. I’ll never use any other brand. I like that you can leave the stripper on for hours without damaging the wood. It also doesn’t give off a strong chemical odor like every other stripper I’ve used and it doesn’t take a lot of effort to remove the finish.
Make sure you use chemical resistant gloves before applying the stripper with a paint brush. Apply thick even coats and allow it to sit for the recommended time per the instructions. You can use a putty knife or a scraper designed specifically for stripping to remove the stripper.
You may need to reapply the stripper multiple times to fully remove the finish. You typically need to wait at least 24 hours before moving onto the next step, but read the instructions to be exact. Use acetone to wipe the piece down before sanding because even though you used a stripper you’ll want to sand before applying any paint or stain.
Step 3: Fix Imperfections
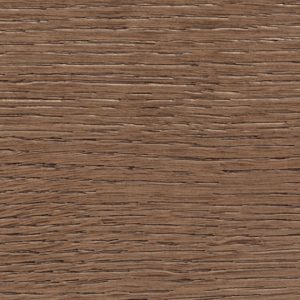
Asses the piece and determine what will need to be repaired. Use wood filler to patch any nicks, gouges or scratches in the wood. You can also fill in the grain, but this step is completely optional and largely depends on the type of grain in the wood. If the grain is tight, like cherry, maple or birch wood, you may not want to fill it. If the grain is more open, like elm, oak or ash, you may want to apply a filler.
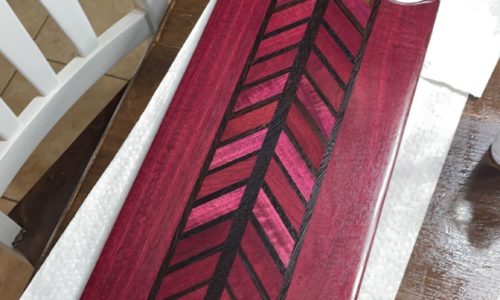
Step 4: Paint or Stain
First, you need to decide whether you want to paint your wood furniture, or if you want to stain it. I guess it really depends on where you put the piece.
Staining:

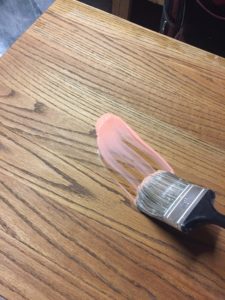
Use a sanding sealer first. Allow the sealer to soak into the wood and then wipe off any remaining excess. This well help the stain absorb evenly. Once you’ve applied the sanding sealer, you’ll want to decide what type of stain to use i.e. water based stains, oil based stains, gel stains and one step stains that include the stain and finish in one (I don’t recommend one step stains).
You can apply stain with a brush, rag, or foam brush. Allow the stain to penetrate for for a few minutes and wipe away the excess with a clean cloth. You may need to apply multiple coats until you’ve reached your desired color. Make sure to read the directions to determine how much time the stain needs to dry before applying another coat.
Painting:

Step 5: Top Coat
Final Thoughts
I hope you now have a better understanding of refinishing wood furniture. This is personally one of my favorite hobbies, and I hope you enjoy it as much as I do. Feel free to leave questions or comments below, as I love hearing from readers! Also make sure to follow us on Facebook and Pinterest for all of the latest!